Witches and Wonders Halloween Blog Hop

When you think of Halloween you probably don’t think of putting up a tree. And to be honest, it’s not something I’ve ever done… Until now! I was super excited when I received an email to work with Treetopia and be apart of their Witches and Wonders Halloween Blog Hop! What is that you may ask? It’s where myself and four other ladies chose one of the beautiful Treetopia trees and gave them little Halloween twist!

Today I’m sharing with you my Halloween inspired tree!

Halloween inspired tree

It’s no surprise Tinsel found her cozy spot right in the middle of all the action 🙂 But no complaints here! She looks beautiful next to my Halloween tree! I was a little nervous at the thoughts of decorating a tree in colors I typically don’t use. But I’ll tell ya what, I’m just tickled with how it turned out!

The gorgeous black and gold ombre Christmas tree totally steals the show! This is such a beautiful tree and I cannot wait to decorate it for Christmas too! It’s definitely one that I will be using again and again! Conveniently, we were watching our favorite Halloween movie, Hocus Pocus, and I began to gather inspiration for my design!

Halloween inspired tree

I wanted to include some of the significant necessities of this frightful holiday. Things like skulls, witch hats, broomsticks, witch fingers and spider webs! I had fun incorporating colors like orange, green and purple into it too! My little girl didn’t have school the day we decorated the tree, so she had a lot of fun helping me add on the fun items that brought this tree to life!

Even baby Gray decided to “help” with the tree, haha!

So what do you think? Something you could see or yourself doing next year? What a fun addition to Halloween decor!

Thank you for stopping by! Be sure to check out the other bloggers participating!

Jennifer Perkins

All Things with Purpose

Sunshine and Sippy Cups

The Latina Next Door

Early Fall Mantel

Hey you, welcome! I’m so happy you’re here hanging out with me this morning! It’s beginning for feel more like Fall here in Ohio… The temps are crisp in the mornings and evenings and it’s got me so excited for them to stick around!

Today I’m excited to share with you my early Fall mantel. It isn’t anything over-the-top. It’s very simple and clean, and I love it! I have had a major obsession with silver dollar eucalyptus lately. It is just so beautiful and whimsy, I can’t get enough of it! It pairs perfectly with white and blue pumpkins, which I’m also obsessed with this time of year. I’m a firm believer that using books as “fillers” in design, is one of the best things ever! I love incorporating books, as often as possible. It just makes the space look and feel cozy, instantly.

Fall mantel

You know, I love making book page banners too, so this one is a glitter F A L L banner; super simple. Check out my banner from last Fall here! I will have these adorable glitter Fall banners for sale at the Zassy’s Fall Barn Sale October 1-3, and also for purchase in my Etsy shop, soon!

Fall mantel

Fall mantel

Thank you so much for stopping by and checking out my early Fall mantel design! I hope you’re leaving here a little more inspired to think outside the Fall design box! 😉 Have a wonderful week and come back soon!!

Sharing on these amazing blogs!

DIY work desk

The truth is, sometimes it takes me months to finally write a post on projects we’ve accomplished around the house. You may remember awhile back, me sharing some photos on Instagram of a table my husband and I were making. We actually created it to be a work desk for my office! To this day, it is one of my favorite pieces we’ve ever made!!

DIY office desk

This DIY work desk is the perfect piece for my office and allows me to have the adequate amount of working space I need for things like my sewing machine, printer and silhouette! And lucky you, I’m sharing how we made it today 😉

We headed to Lowe’s and purchased a clear kiln-dried aspen panel that measured 24″w X 72″l for the top, 3 spruce pine furring strips that measure 1″ X 8ft., and 2 spruce pine furring strips that measured 2.5″ X 8ft.. Previous to starting our project we purchased oak wood table legs from Amazon here, but you can purchase similar from Lowe’s here. Once home, we began to assemble the table! Choose a side for the top and bottom of the aspen panel. Make sure you have a sturdy work station. In our case, we used to saw horses to rest the panel on. Please excuse our messy garage!! Next, take a strip of the 1″ furring strips, measure it to length of the panel and cut, continue for each side. Using your nail gun, nail each piece into place. The top side of the table will be flat, but the bottom will have a bit of a lip. Get your table legs and position them to your desired location on the bottom of the panel. Using an angel, drill and screw into place. Grab your 2.5″ furring strip and measure between each leg, cut to size and screw into place. Using some extra 1″ furring strips, create some stability for the table by using short screws and screwing equally the length of the panel. Flip your piece over and relish in it’s beauty!!

Make sure everything is even and there are no screws popping through. Using filler, begin to fill your nail holes. Once dry, use a sanding block and sand until smooth. I used a dark walnut stain I already had and stained the entire piece. Once that was dry, I made a mixture of white paint and water for whitewashing. I love using the whitewashing technique because it gives it a worn, rustic look! Work in small areas when whitewashing. Simply brush it on, allow it to sit for a few seconds and wipe it off with a clean white towel. Continue this for the entire piece. The longer you allow the whitewash to sit, the more the piece will absorb the color.

DIY office desk

I am just tickled with how the finished product turned out! It’s truly a beautiful piece to see in person and it looks so expensive!!

So what do you think? Thank you for stopping by! Be sure to stop by next week, I’m sharing how I made the french-inspired drop cloth skirt!

Sharing on these blogs!

The Windsor Bench

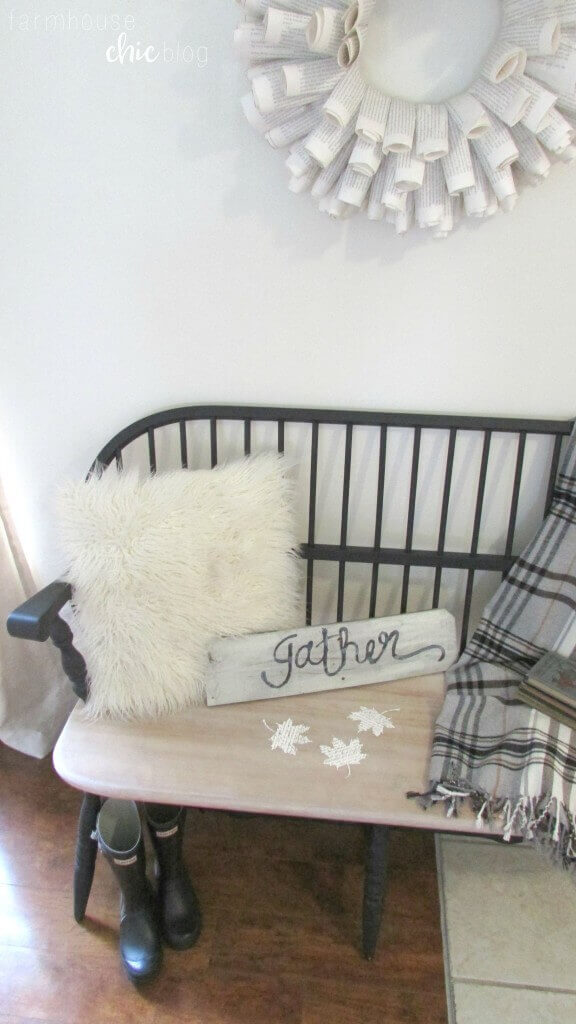
Hello friend! It’s great to have you here today! It was a beautiful weekend that consisted of lots of laughs, dreamy weather and a little farm market that had pumpkins!! As you can imagine, I was ecstatic about that! I have been busy preparing for the barn show I will be a part of the first of October ( I will share more about that later!). That has put me even more in the mood for Fall, because I’m making so many lovely Fall decor items! With that said, I finally finished the Windsor bench and I was eager to decorate it for Fall 🙂

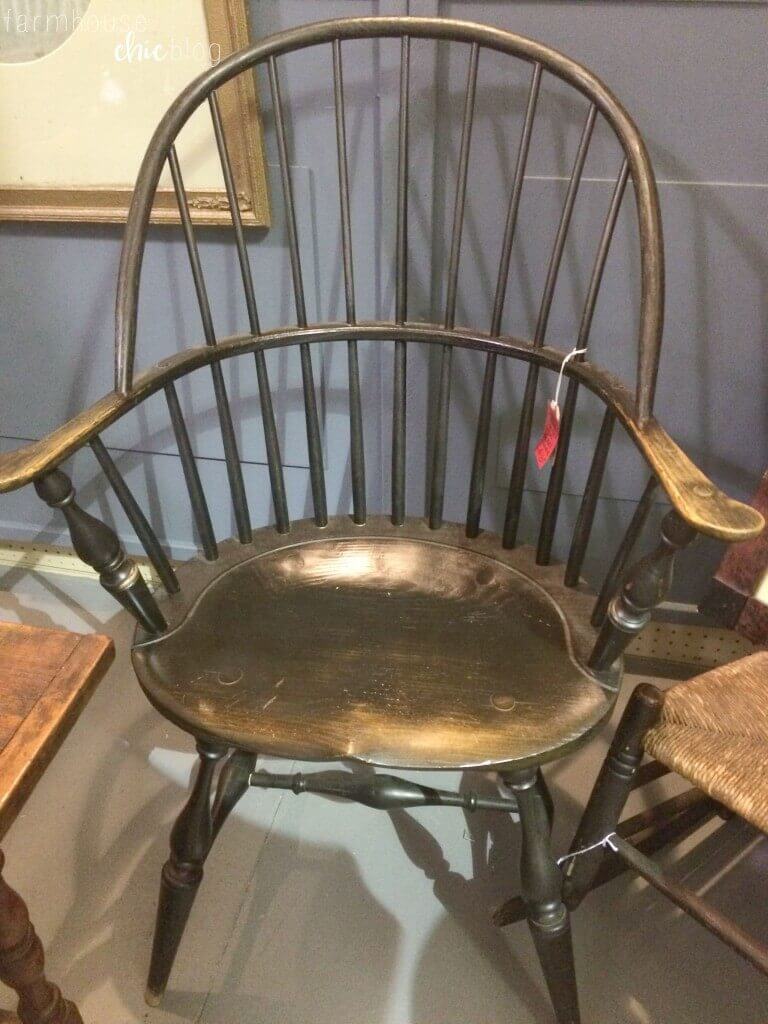
A few months back while shopping at a local Antique Mall, I came across a really lovely, old black Windsor chair. I mean this thing was beautiful! I quickly looked at the price tag, only to be shocked it was $495! Say whaaat? Crazy stuff right there! I left, somewhat, broken hearted…

home decor

A few days later, to my surprise I came across a very similar bench someone was selling. I jumped on that like a hot cake, and ended up getting it! I was like a little kid in a candy store! It was beautiful, and I couldn’t wait to get working on it!

When we bought it, it was a combination of hunter green stained wood and a stained maple-colored seat. I didn’t care for the combination, and I kept reverting back to the black Windsor chair, so I knew it was going to be black! Black is a color I have never painted a piece of furniture before, so I was a little intimidated… You can see the “before” picture below, and PLEASE excuse our messy garage! I’m just keepin’ it real folks 😉

home decor

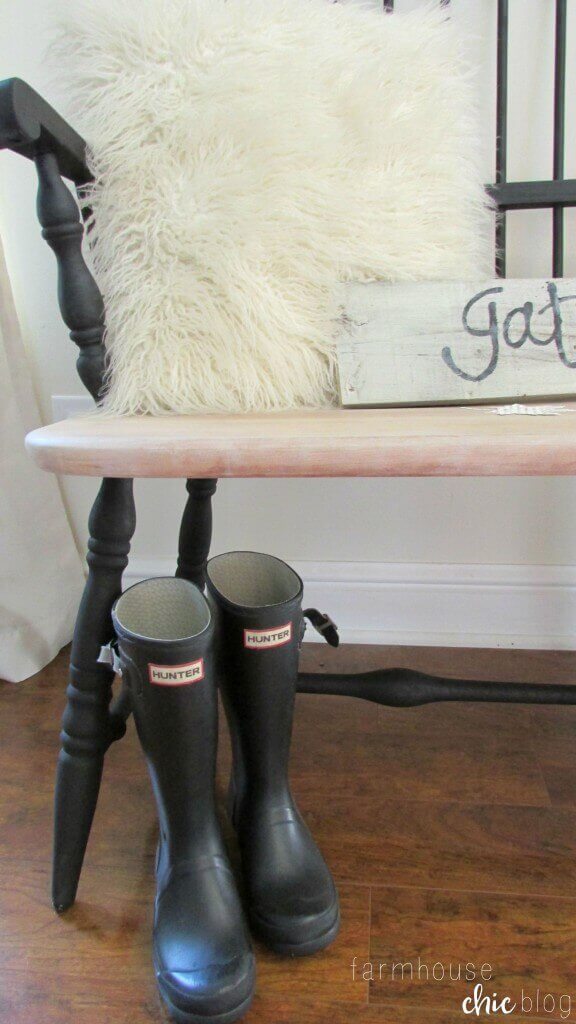
Before I got to painting, I sanded the seat down to the natural wood. It was looking better already!! I began painting soon after, no taping off, nothing. I quickly realized that was a big mistake when I started getting close to the ends of the spindles; oh, did I forget to mention the seat wasn’t going to be painted black! Yes, so smarty pants me, I figured I could easily sand off any small marks I would get on the wood while painting.. wrong! It was a disaster, and I may have cried. I called my husband and he had just the trick to fix it. He hooked up a wire brush attachment to his cordless drill, and with a little bit of time, the paint marks were gone! I took the time (a really, really long time!) to tape around each spindle so no marks would get on the seat. Using a foam brush, I began painting with folk art rich black chalk paint. I love this chalk paint! It covers amazingly, and is so affordable compared to similar products. I allowed each coat to dry completely, giving it a total of 3 coats. The entire piece dried for a couple of days before I began the next step!

I loved how the bench looked!! It was a totally different piece from when I had first got it! But, I wasn’t done yet… I wanted a little more character, so I opted for Miss Mustard Seeds white wax. I applied the wax using a wax brush, applying even coverage to each part. I gave it a good two coats. Once it was dry, I topped the entire piece off with a folk art clear wax. And it was finally done! DONE! I was so happy with how it turned out! I couldn’t wait to get it inside and stage it for Fall 🙂

home decor

home decor

home decor

home decor

So, what do you think of how it turned out? I can’t wait to hear what you all have to say!

Thanks so much for stopping by and hanging out with me a bit today!

Sharing this project on these blogs!

* Affiliate links provided for your convienece!

Little Drummer Boy- Inspired Christmas

This year, I teamed up with Treetopia to create a one-of-a-kind little drummer boy- inspired Christmas tree! To some, I may decorate too early, but for me I just get to enjoy it longer! Being a home decor blogger, doesn’t help much either 😉 It’s kind of like retail, you have to stay ahead of the game! Decorating early comes with the territory.

One of my very favorite things about decorating the Christmas tree each year, is gathering the inspiration for that specific tree. I wanted my tree to be simple, yet beautiful and I have to say, I think I accomplished just that! The tree I chose this year for my office, was the Alexander Fir Christmas Tree 7.5’ Clear. It’s full branches and perfectly placed white lights are magical!

I always begin by placing my statement pieces or ornaments first. I’ve found that going in a pattern works best and makes the tree have some symmetry. So in this case, I added the gemmed up beaded ornaments first, alternating the gold and bronze. These ornaments are so unique and catch the light beautifully! I wasn’t quite sure at first, how I was going to capture the theme of the little drummer boy. Then, I thought something as simple as, little drummer boy silhouettes would immediately set the tone. I found these free silhouettes here. To continue with that theme, I printed off the sheet music of the hymn, here. These were simply the best touches of the tree!

Christmas tree

Next I went through and added some simple picture frame ornaments, mercury glass balls and sprigs here and there for texture. The simplicity of this design is captivating to me! It truly is simple and allows me to enjoy the beauty of the tree and white lights!

Speaking of white, I went outside my comfort zone a little and opted for a white garland. When I first opened the package I was a little nervous I wouldn’t be able to incorporate it into my design. But, this just goes to show sometimes stepping out of your comfort zone is necessary, even if it’s just decorating for Christmas 😉 Had the garland been the traditional green, I think it would of been too much and completely taken away from the tree. I draped the glittering white garland with a frosted eucalyptus garland I previously had and it was the perfect touch!

The beautiful sadie Fir wreath fit like a glove on my beloved silhouette stand. To tie in with the design, I simply tied a piece of satin white ribbon around the waste. What a big difference that little detail made! At a routine stop at Marshall’s, I spotted sheet music wrapping paper. That was the icing on the cake, if you will, to the little drummer boy Christmas tree!

It was a true treat to be apart of the Treetopia Design Council this year! Make sure to stop by and check out all the other amazing Christmas designs!

Treetopia’s 6th Annual Secret Santa Sweepstakes

Spread the cheer of Christmas with Treetopia’s annual Secret Santa Sweepstakes! You and your loved one can get a chance to win a tree and an ornament set by choosing your favorite look from our 2017 Design Council and telling us why it suits your holiday style. Ready those sleigh bells and sing your way through the merriest time of the year!

Duration: November 14-25, 2017

Follow along with Treetopia via social media:

Facebook: Treetopia Twitter: @treetopia
Instagram: @treetopia Pinterest: Treetopia

Scroll to top