A spooky formal…

Hey there! As you’ve heard me mention, a time or two recently, I have had a good bit of fun decorating for Halloween! This is the first year ever that I have done this much for Halloween, and it’s been entertaining! I decided to give our prim-and-proper formal dining room a little spooky makeover!

Halloween

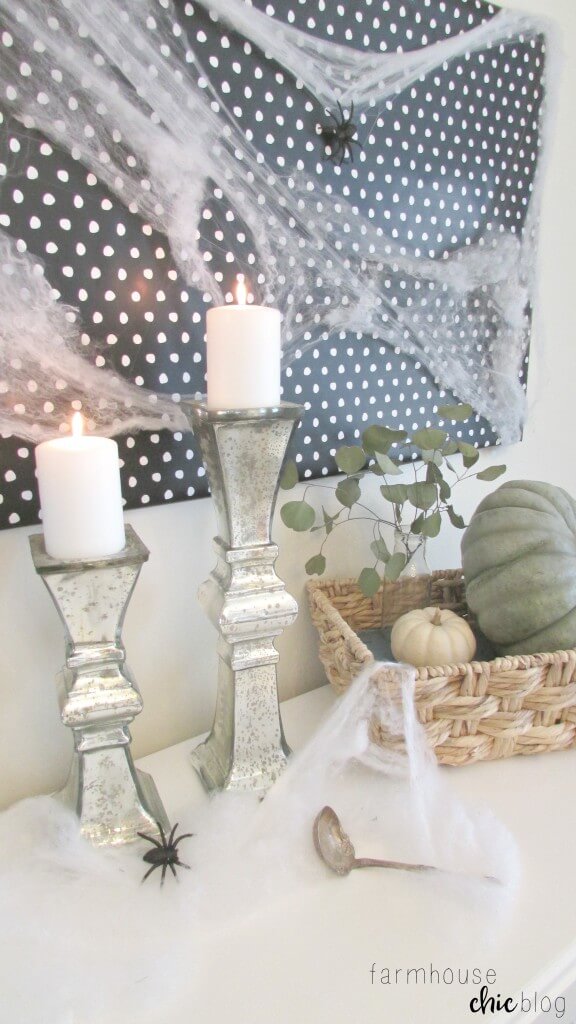
Sticking with the neutral theme we have gone with this year, I wrapped my farmhouse canvas print with a black and white polka dot wrapping paper. This made a difference right away, and it was so simple! From there, I draped faux spider webs across it and dangled a glittery spider near the center. I rearranged my buffet with the decor and allowed it to accommodate very little clutter and added more faux webbing and spiders.
Halloween

Next is where I had a little bit of fun 🙂 Adding some pops of orange into the bunch, I created my Halloween centerpiece! I bought these beautiful paper fans from Target for only $5! They were the focus of my design. I added a couple of orange pumpkins, mini white pumpkins, faux webbing, acorn squash, vintage books and mercury glass into the design.

For me, I start with the center of my table. This is where I added the most height, since this is what the eye automatically draws to. I stacked a couple of vintage books and placed a mercury glass taper candle in the center. I worked around that and created my centerpiece from there. I usually mirror one side to the other. Not using the exact same things, but keeping it similar so the design doesn’t look awkward. I added a short little piece of black and white buffalo check ribbon to my acorn squash. Just that little thing made them fit right in!

Halloween

Halloween

Halloween

What do you think? Spooky chic! I love the fact that I was able to created this centerpiece using items I already had (besides the paper fans!). Incorporate items you already have, so you don’t have to feel guilty for buying new items or additional cost!

Thanks so much for stopping by today! I hope your day is wonderful.

Sharing this project on these blogs!

Shop Online for the Right Apple Watch Band for Your Wrist

As you prepare to purchase Apple Watch, you should consider the present apple watch band options and the wrist size that gives an ideal fit. You will come through many bands which require specific sizing while others fit well in the different wrists. This is a guide that will take you in the different Apple Watch bands you would ever wish to come across.

Measure the Wrist

As you select the band, always ensure you get to measure the wrist. Whenever there is a cloth tape on one’s hand, it is best to wrap it in the wrist and acquire an ideal band size. In case you lack a tape measure cloth, it is best to pick on a string and thus wrap it in your wrist. Also, get to use a standard flat ruler or flat tape. The role of the tape is to help measure the string part which fits in the wrist in the right manner. Also, ensure you measure the measuring tape or a string that does not bring errors in the course of making measurements.

Size of Apple Watch

Apple gives Apple Watch Series in 45mm/44mm/42mm and 41mm/40mm/38mm sizes as you will see when you Check out these 10 Best Apple Watch Bands For Big Wrists. The main step involves making a selection of the Apple Watch with the right size. With a smaller wrist, it is best to pick on the Apple Watch which is a smaller option. Also, the larger wrist will require to use bigger models. These apple 38/40/41mm watch models have been designed in a manner that they have a 130 to 200mm wrist size.

Individual Sizing and Band Options of Apple Watch

With an ideal Apple Watch size, you will delve into the different bands which come with the best kind of fit. Besides, you will have a look at the materials that the different bands and the nature in which they feel while put on the wrist. Different Apple Watch bands come in different sizes. Besides, it is not all the bands that are compatible with the different models. For instance, the modern buckle is limited to the use of the 41mm, 40mm and 38mm models.

Braided Solo Loop and Solo Loop

The braided solo loop and solo loop are two types of bands that have no kind of clasp. Besides, the bands come in twelve different sizes rather than the use of an adjustable clasp or loop. As a result, there is a great need for one to measure the bands in the right manner. For you to result with experience watch models which are smaller and compatible with the different bands, take your time. It is quite tricky for any person to acquire the right fit on different bands. For you to get an error-free experience, ensure you visit sharkwatchband site and this way you will determine what is best for your different needs.

Leather Link Watch Band

Leather Link

A band that comes from leather consists of a wraparound fit. The band end is secured with the aid of molded and flexible magnets. This fit is quite different from sport loop and it has leather materials rather than woven nylon. Since it is made of leather, it is best for use as one exercises especially in water. This way, you will ensure you never get to subject it to the presence of sweat.

Modern Buckle

This is a product which is made of leather materials. Besides, this product is much smaller. In the case of compatibility, it has great compatibility with the 44 and 45mm larger apple watches. Besides, the modern buckle contains a buckle clasp that fits well with different bands. As a result, there is a great need to ensure you purchase the size which is appropriate for the wrist size. The main sizes are three and the smallest measures 135mm.

Milanese Loop

You will find that the Milanese loop consists of a stainless steel mesh which comes with a wraparound design that is much similar to the Sport Loop. Similar to other Apple Watch bands, their size kicks off at 130mm. Also, there is a great need for one to note the Apple Watch bands which are smaller have a 200mm topping. In the case where one has a larger wrist, you will find the Milanese Loop to be much smaller.

Conclusion

With all the different bands in the market, the best fit is one that matches your size. Thus, Check out these 10 Best Apple Watch Bands For Big Wrists to determine the best for you. The major watch bands entail the Solo Braided Loop and the Solo Loop stretch. With these two kinds of bands, you will determine the size which is best for you.

The Most Popular Bag Types for Men in 2023

What we carry says a lot about who we are. And in 2023, the types of bags men choose are as diverse as they are practical. From classic leather briefcases to the trendy canvas laptop backpack, there’s a style to suit every man’s needs. Here are the five most popular bag types for men in 2023.

Crossbody Bags

The crossbody bag is a convenient, stylish choice that tops the list. This bag is lightweight and comfortable, with a strap that crosses the body for a secure fit. It is ideal for daily use and offers enough space for essentials like wallets, phones, and keys. It’s perfect for men who prefer a laid-back, casual style.

Leather Briefcases

Even in the digital age, the traditional leather briefcase symbolizes professionalism. With a sleek design and durable build, leather briefcases are a mainstay for businessmen. These cases provide ample space for documents, laptops, and other essentials. A well-crafted leather briefcase exudes confidence and elegance.

Canvas Laptop Backpack

In 2023, the canvas laptop backpack is not just for students anymore. It’s become an everyday item for professionals and travelers alike. Made with durable canvas, these backpacks protect laptops and offer plenty of room for other items. Their comfortable, balanced load distribution makes them a preferred choice for men on the go. With various compartments for easy organization, the canvas laptop backpack is a stylish, practical solution for carrying your world.

Popular Bag Types for Men

Messenger Bags

With a design combining the best crossbody bags and briefcases, the messenger bag is a favorite among many men. Whether in rich leather or rugged canvas, messenger bags are ideal for those who need easy access to their items. Their spacious interiors and various pockets provide an excellent balance of style and functionality.

Gym Duffle Bags

Health and fitness continue to be a priority for many men, and the gym duffle bag reflects this trend. It’s perfect for the active man, with ample room for workout clothes, shoes, and small exercise equipment. Gym duffle bags are practical and durable and made from robust materials that withstand regular use.

Conclusion

The bags men choose in 2023 are not just about carrying things; they’re about expressing personality and meeting diverse needs. Whether it’s the functional canvas laptop backpack or the sophisticated leather briefcase, each popular bag type offers a unique blend of style and practicality. So, choose a bag that suits both your needs and your style because, in 2023, there’s a bag for every man.

The Style Guide to Wearing a Rose Gold Apple Watch Band

Rose gold is undeniably a unique color for an apple watch band. However, most people are afraid of choosing this option because they don’t know how to style it with other clothes and accessories. On the contrary, rose gold is one of the most versatile color options in the fashion industry. It blends well with all skin tones and a wide range of colors. It also matches with formal and casual wear. Therefore, it should be easy for you to style it.

If you want to buy apple watch band for rose gold and you don’t know what to wear it with. Below we have compiled a couple of tips to help you style and wear a rose gold apple watch band.

Wearing a Rose Gold Apple Watch Band

Casual Wear

A rose gold apple watch band can be styled to suit all occasions, including casual wear. You can rock this hue with a pair of jeans and a t-shirt. Rose fold blends really well with natural colors. Therefore, if you are styling a casual outfit, go for a black or blue pair of jeans with your rose gold apple watch band. As for the t-shirt, you can play around with neutral colors such as black, white, brown and gray.

Because rose gold tends to pop out. It will complement your casual wear. This hue will also add some complexness to a simple casual outfit.

Formal Wear

For formal outfits, rose gold also looks good when worn with dark-colored suits. This applies to both men and women. This apple watch band color radiates a sense of power and uniqueness. It will, therefore, add some charm to your formal outfit and break the monotony.

Extra Accessories and Jewelry

If you love wearing accessories, then a rose gold apple watch band won’t be the only thing on your body. Below are some accessory combinations that look stunning when combined with rose gold apple watch bands;

• Silver Jewelry: One would assume that a rose gold apple watch band would clash with silver jewelry such as earrings and bracelets. But these two create a remarkable contrast. Silver features cooler tones which complement the warm tones of rose gold. Whether it’s a casual or formal outfit, don’t be afraid to add some silver alongside your rose gold apple watch band.

• Rose Gold Jewelry: If you are not a fan of mix and matches, you can play it safe by wearing extra accessories in a similar rose gold hue. Your outfit will make a bold personal statement when all your accessories are rose gold. Such a dress code evokes drama and confidence.

Is a Rose Gold Apple Watch Band Suitable for Men and Women?

Gone are the days when specific colors were assigned to different genders. Today, any man or woman can wear a rose gold apple watch band, and they would look amazing. Rose gold is a soft, dark and golden shade of hue. It, therefore, comprises a touch of both femininity and masculinity. Gender should be the last thing on your mind when styling a rose gold apple watch band.

You Can Never Go Wrong with a Rose Gold Apple Watch Band

Rose gold is currently the trendiest color for apple watch bands because you can wear it with anything. From formal to casual, this hue will blend well with other colors and complement your outfit.

Feminine Farmhouse Christmas

Hey friends! If you checked out my post from last week, you got a little peek of my office decorated for Christmas! Well, today I get to share more of a reveal with you! I absolutely LOVE decorating for Christmas!! I am a firm believer you should have multiple Christmas trees in your home! This year we have three large ones on each floor and I’m also considering putting one in our master bedroom (but shh.. don’t tell my husband that part!) 😉

farmhouse office decorated for Christmas

I have decided to do something I haven’t done before.. I usually decorate and incorporate red into my Christmas design each year, but this year I didn’t! But who’s to say I still won’t 😉 I had fun decorating my office because I was able to be a little more feminine and use textures and patterns I really like, opposed to our family tree in the living room.

I put my 6 ft. pre-lit tree I bought from Target in my ceramic antique tub and it fit perfectly cornered behind my couch! I used very simple things as ornaments so I wouldn’t have to go out and buy all new ones. I used rolled up book pages and folded them in half to give an accordion look and placed them throughout the tree. I also took metallic chalkboard gift tags I snagged from Target dollar spot last year, and wrote things that mean the most to me (family, love, joy, etc.). I also added small strands of crystals and just hung them from the branches. They are absolutely beautiful when the light hits them!! You can see the cute little picture frame ornaments I made, that are perfect for this tree! I also love the large overly-glittered cardboard letters that say “Merry Christmas”, simply drooped across the tree!

This is a fun little mix to farmhouse chic design! I’ve always had a thing for polka dots, black & white and leopard! I feel like this flawlessly incorporates them all <3

farmhouse office decorated for Christmas

It was a real pleasure to have you visiting my home office today! I hope that you will stop by again soon! Have a wonderful Thanksgiving friends <3

Sharing this post on these blogs!

Customized Stenciled Sign

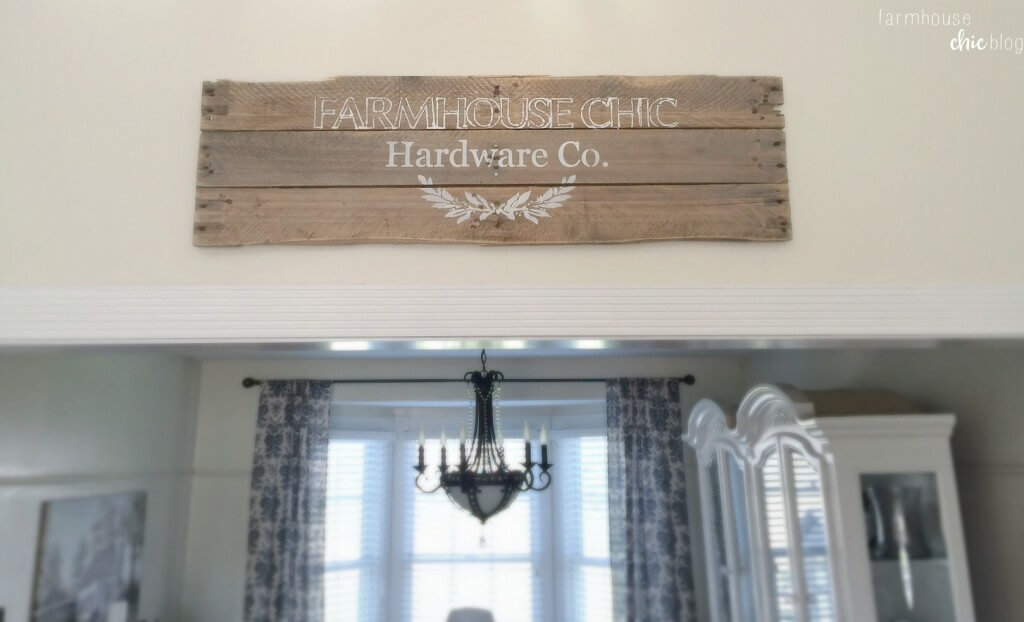
Hello friends! To some I may be known as the crazy sign lady… What? No, no one has ever called me that! 😉 But, I love signs… I love making signs. Can you ever have enough of them? When the opportunity came up to work with Wall Masque stencil company, they told me they had a customized stencil option. I hopped on that like a hot cake, that is right up my alley!

wood sign

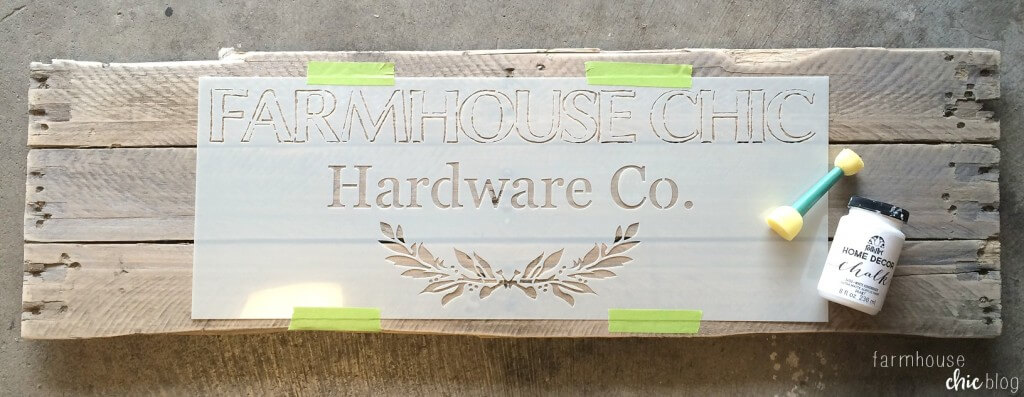
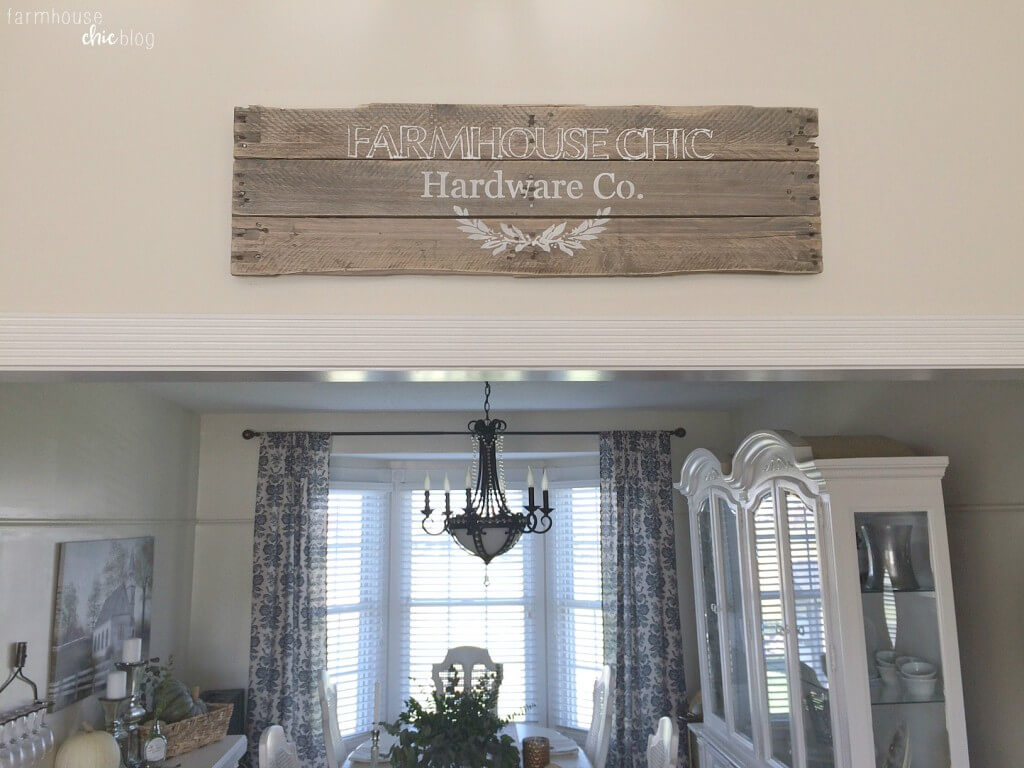
The process for submitting a custom design was rather simple. I created an image using PicMonkey and sent it to them. Within minutes, I had a response that my design had been accepted, and I received my stencil a couple of days later! I opted for “farmhouse chic hardware co.” because it’s so fitting to our household! Of course my blog is Farmhouse Chic, but my husband also builds custom farmhouse tables, so it was a no brainer!

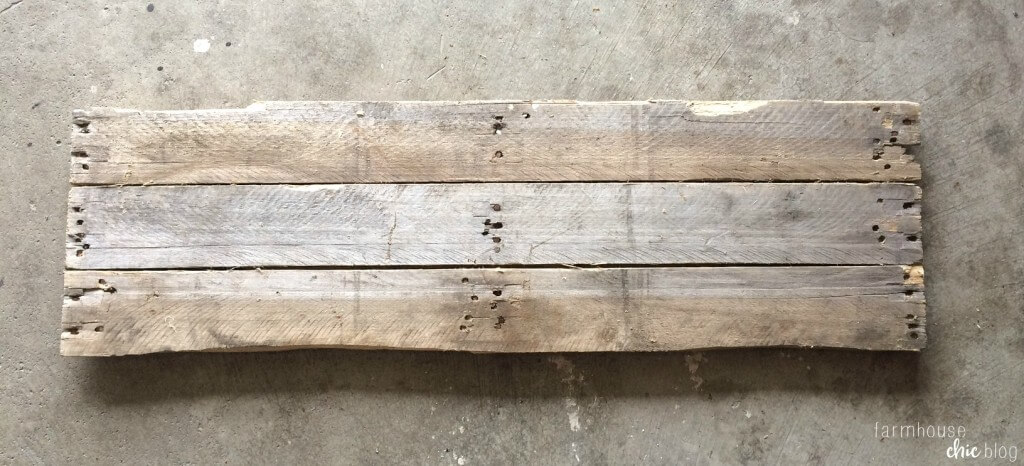
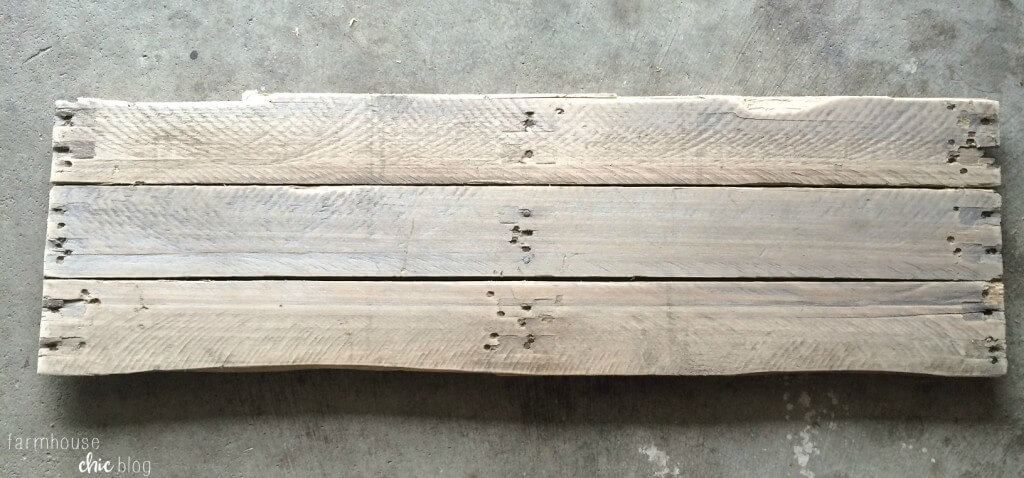
To begin, my husband took three narrow pallet planks and screwed them to a small piece of plywood. I sanded the wood down for a smooth consistency. Next, grab your stencil and tape into place. Using a foam brush take your desired paint and blot over the stencil. I used folkArt home decor chalk paint in white adirondack. It’s my go-to for projects! Don’t get paint happy, use a small amount so it doesn’t create puddling, you can always go back over it if needed. Remove your stencil while the paint is still wet! I allowed my sign to dry completely, and I roughed it up very little using a sanding block. To finish, I sprayed with with a matte clear coat. We hung that pretty up and just love it <3

wood sign
BEFORE SANDING

wood sign
AFTER SANDING

wood sign wood sign

wood sign

Wall Masque is one of my awesome sponsors in my current giveaway!! Don’t miss your opportunity to win a credit for anything you like from them! They have some beautiful stencils and, of course, the customized option! Click HERE to enter the giveaway! Giveaway ends midnight November 13th, 2015.

*Affiliate links included for your convenience.

Thank you so much for stopping by!

Sharing this project on these blogs!

Witches and Wonders Halloween Blog Hop

When you think of Halloween you probably don’t think of putting up a tree. And to be honest, it’s not something I’ve ever done… Until now! I was super excited when I received an email to work with Treetopia and be apart of their Witches and Wonders Halloween Blog Hop! What is that you may ask? It’s where myself and four other ladies chose one of the beautiful Treetopia trees and gave them little Halloween twist!

Today I’m sharing with you my Halloween inspired tree!

Halloween inspired tree

It’s no surprise Tinsel found her cozy spot right in the middle of all the action 🙂 But no complaints here! She looks beautiful next to my Halloween tree! I was a little nervous at the thoughts of decorating a tree in colors I typically don’t use. But I’ll tell ya what, I’m just tickled with how it turned out!

The gorgeous black and gold ombre Christmas tree totally steals the show! This is such a beautiful tree and I cannot wait to decorate it for Christmas too! It’s definitely one that I will be using again and again! Conveniently, we were watching our favorite Halloween movie, Hocus Pocus, and I began to gather inspiration for my design!

Halloween inspired tree

I wanted to include some of the significant necessities of this frightful holiday. Things like skulls, witch hats, broomsticks, witch fingers and spider webs! I had fun incorporating colors like orange, green and purple into it too! My little girl didn’t have school the day we decorated the tree, so she had a lot of fun helping me add on the fun items that brought this tree to life!

Even baby Gray decided to “help” with the tree, haha!

So what do you think? Something you could see or yourself doing next year? What a fun addition to Halloween decor!

Thank you for stopping by! Be sure to check out the other bloggers participating!

Jennifer Perkins

All Things with Purpose

Sunshine and Sippy Cups

The Latina Next Door

Early Fall Mantel

Hey you, welcome! I’m so happy you’re here hanging out with me this morning! It’s beginning for feel more like Fall here in Ohio… The temps are crisp in the mornings and evenings and it’s got me so excited for them to stick around!

Today I’m excited to share with you my early Fall mantel. It isn’t anything over-the-top. It’s very simple and clean, and I love it! I have had a major obsession with silver dollar eucalyptus lately. It is just so beautiful and whimsy, I can’t get enough of it! It pairs perfectly with white and blue pumpkins, which I’m also obsessed with this time of year. I’m a firm believer that using books as “fillers” in design, is one of the best things ever! I love incorporating books, as often as possible. It just makes the space look and feel cozy, instantly.

Fall mantel

You know, I love making book page banners too, so this one is a glitter F A L L banner; super simple. Check out my banner from last Fall here! I will have these adorable glitter Fall banners for sale at the Zassy’s Fall Barn Sale October 1-3, and also for purchase in my Etsy shop, soon!

Fall mantel

Fall mantel

Thank you so much for stopping by and checking out my early Fall mantel design! I hope you’re leaving here a little more inspired to think outside the Fall design box! 😉 Have a wonderful week and come back soon!!

Sharing on these amazing blogs!

DIY work desk

The truth is, sometimes it takes me months to finally write a post on projects we’ve accomplished around the house. You may remember awhile back, me sharing some photos on Instagram of a table my husband and I were making. We actually created it to be a work desk for my office! To this day, it is one of my favorite pieces we’ve ever made!!

DIY office desk

This DIY work desk is the perfect piece for my office and allows me to have the adequate amount of working space I need for things like my sewing machine, printer and silhouette! And lucky you, I’m sharing how we made it today 😉

We headed to Lowe’s and purchased a clear kiln-dried aspen panel that measured 24″w X 72″l for the top, 3 spruce pine furring strips that measure 1″ X 8ft., and 2 spruce pine furring strips that measured 2.5″ X 8ft.. Previous to starting our project we purchased oak wood table legs from Amazon here, but you can purchase similar from Lowe’s here. Once home, we began to assemble the table! Choose a side for the top and bottom of the aspen panel. Make sure you have a sturdy work station. In our case, we used to saw horses to rest the panel on. Please excuse our messy garage!! Next, take a strip of the 1″ furring strips, measure it to length of the panel and cut, continue for each side. Using your nail gun, nail each piece into place. The top side of the table will be flat, but the bottom will have a bit of a lip. Get your table legs and position them to your desired location on the bottom of the panel. Using an angel, drill and screw into place. Grab your 2.5″ furring strip and measure between each leg, cut to size and screw into place. Using some extra 1″ furring strips, create some stability for the table by using short screws and screwing equally the length of the panel. Flip your piece over and relish in it’s beauty!!

Make sure everything is even and there are no screws popping through. Using filler, begin to fill your nail holes. Once dry, use a sanding block and sand until smooth. I used a dark walnut stain I already had and stained the entire piece. Once that was dry, I made a mixture of white paint and water for whitewashing. I love using the whitewashing technique because it gives it a worn, rustic look! Work in small areas when whitewashing. Simply brush it on, allow it to sit for a few seconds and wipe it off with a clean white towel. Continue this for the entire piece. The longer you allow the whitewash to sit, the more the piece will absorb the color.

DIY office desk

I am just tickled with how the finished product turned out! It’s truly a beautiful piece to see in person and it looks so expensive!!

So what do you think? Thank you for stopping by! Be sure to stop by next week, I’m sharing how I made the french-inspired drop cloth skirt!

Sharing on these blogs!

The Windsor Bench

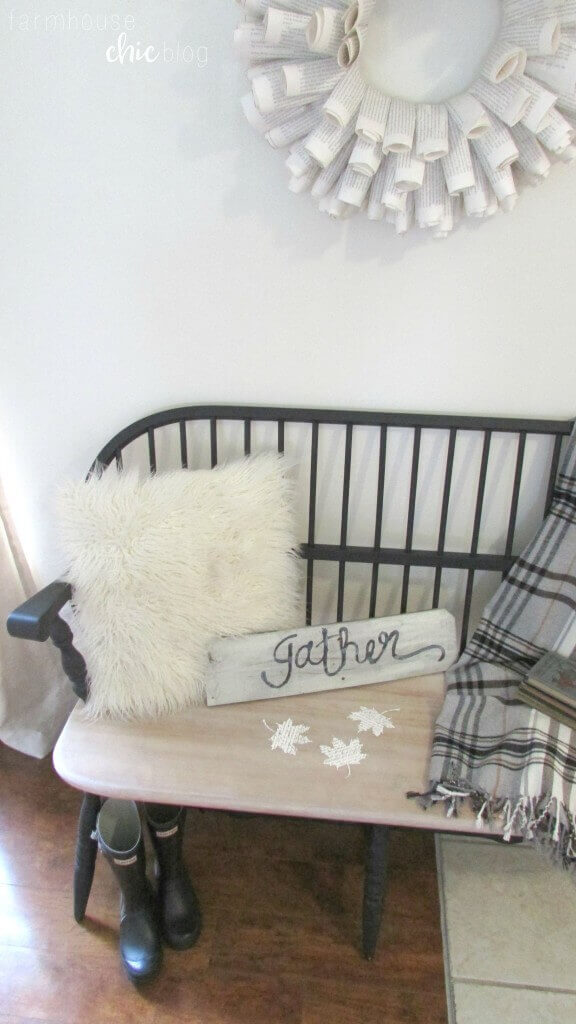
Hello friend! It’s great to have you here today! It was a beautiful weekend that consisted of lots of laughs, dreamy weather and a little farm market that had pumpkins!! As you can imagine, I was ecstatic about that! I have been busy preparing for the barn show I will be a part of the first of October ( I will share more about that later!). That has put me even more in the mood for Fall, because I’m making so many lovely Fall decor items! With that said, I finally finished the Windsor bench and I was eager to decorate it for Fall 🙂

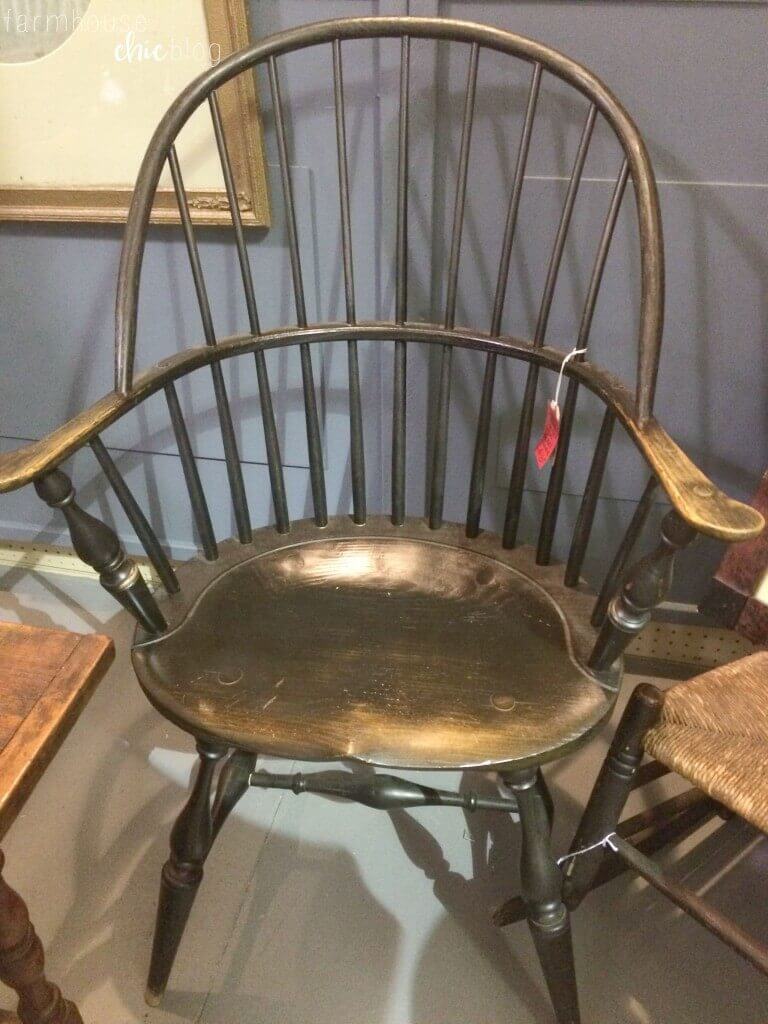
A few months back while shopping at a local Antique Mall, I came across a really lovely, old black Windsor chair. I mean this thing was beautiful! I quickly looked at the price tag, only to be shocked it was $495! Say whaaat? Crazy stuff right there! I left, somewhat, broken hearted…

home decor

A few days later, to my surprise I came across a very similar bench someone was selling. I jumped on that like a hot cake, and ended up getting it! I was like a little kid in a candy store! It was beautiful, and I couldn’t wait to get working on it!

When we bought it, it was a combination of hunter green stained wood and a stained maple-colored seat. I didn’t care for the combination, and I kept reverting back to the black Windsor chair, so I knew it was going to be black! Black is a color I have never painted a piece of furniture before, so I was a little intimidated… You can see the “before” picture below, and PLEASE excuse our messy garage! I’m just keepin’ it real folks 😉

home decor

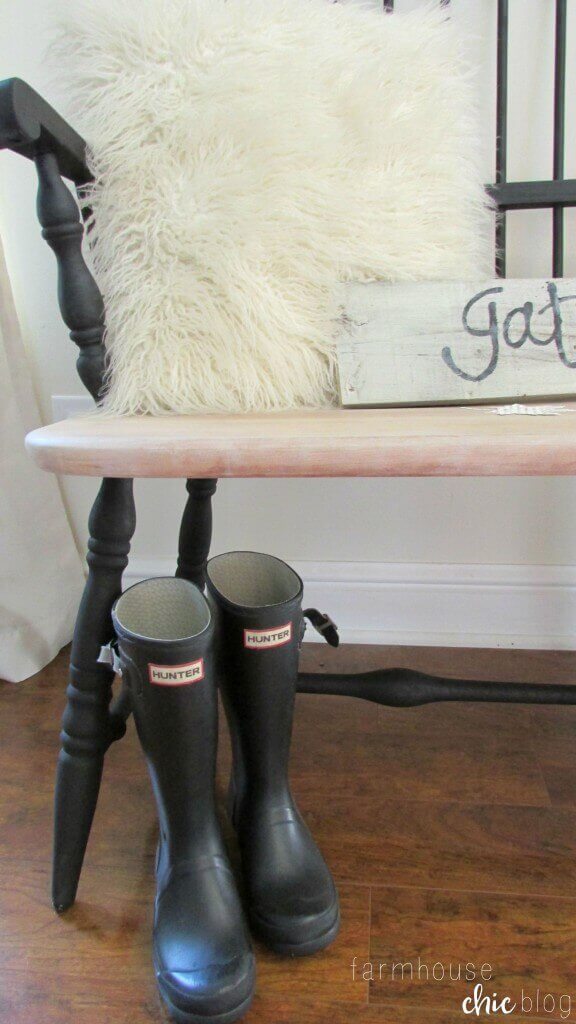
Before I got to painting, I sanded the seat down to the natural wood. It was looking better already!! I began painting soon after, no taping off, nothing. I quickly realized that was a big mistake when I started getting close to the ends of the spindles; oh, did I forget to mention the seat wasn’t going to be painted black! Yes, so smarty pants me, I figured I could easily sand off any small marks I would get on the wood while painting.. wrong! It was a disaster, and I may have cried. I called my husband and he had just the trick to fix it. He hooked up a wire brush attachment to his cordless drill, and with a little bit of time, the paint marks were gone! I took the time (a really, really long time!) to tape around each spindle so no marks would get on the seat. Using a foam brush, I began painting with folk art rich black chalk paint. I love this chalk paint! It covers amazingly, and is so affordable compared to similar products. I allowed each coat to dry completely, giving it a total of 3 coats. The entire piece dried for a couple of days before I began the next step!

I loved how the bench looked!! It was a totally different piece from when I had first got it! But, I wasn’t done yet… I wanted a little more character, so I opted for Miss Mustard Seeds white wax. I applied the wax using a wax brush, applying even coverage to each part. I gave it a good two coats. Once it was dry, I topped the entire piece off with a folk art clear wax. And it was finally done! DONE! I was so happy with how it turned out! I couldn’t wait to get it inside and stage it for Fall 🙂

home decor

home decor

home decor

home decor

So, what do you think of how it turned out? I can’t wait to hear what you all have to say!

Thanks so much for stopping by and hanging out with me a bit today!

Sharing this project on these blogs!

* Affiliate links provided for your convienece!

Little Drummer Boy- Inspired Christmas

This year, I teamed up with Treetopia to create a one-of-a-kind little drummer boy- inspired Christmas tree! To some, I may decorate too early, but for me I just get to enjoy it longer! Being a home decor blogger, doesn’t help much either 😉 It’s kind of like retail, you have to stay ahead of the game! Decorating early comes with the territory.

One of my very favorite things about decorating the Christmas tree each year, is gathering the inspiration for that specific tree. I wanted my tree to be simple, yet beautiful and I have to say, I think I accomplished just that! The tree I chose this year for my office, was the Alexander Fir Christmas Tree 7.5’ Clear. It’s full branches and perfectly placed white lights are magical!

I always begin by placing my statement pieces or ornaments first. I’ve found that going in a pattern works best and makes the tree have some symmetry. So in this case, I added the gemmed up beaded ornaments first, alternating the gold and bronze. These ornaments are so unique and catch the light beautifully! I wasn’t quite sure at first, how I was going to capture the theme of the little drummer boy. Then, I thought something as simple as, little drummer boy silhouettes would immediately set the tone. I found these free silhouettes here. To continue with that theme, I printed off the sheet music of the hymn, here. These were simply the best touches of the tree!

Christmas tree

Next I went through and added some simple picture frame ornaments, mercury glass balls and sprigs here and there for texture. The simplicity of this design is captivating to me! It truly is simple and allows me to enjoy the beauty of the tree and white lights!

Speaking of white, I went outside my comfort zone a little and opted for a white garland. When I first opened the package I was a little nervous I wouldn’t be able to incorporate it into my design. But, this just goes to show sometimes stepping out of your comfort zone is necessary, even if it’s just decorating for Christmas 😉 Had the garland been the traditional green, I think it would of been too much and completely taken away from the tree. I draped the glittering white garland with a frosted eucalyptus garland I previously had and it was the perfect touch!

The beautiful sadie Fir wreath fit like a glove on my beloved silhouette stand. To tie in with the design, I simply tied a piece of satin white ribbon around the waste. What a big difference that little detail made! At a routine stop at Marshall’s, I spotted sheet music wrapping paper. That was the icing on the cake, if you will, to the little drummer boy Christmas tree!

It was a true treat to be apart of the Treetopia Design Council this year! Make sure to stop by and check out all the other amazing Christmas designs!

Treetopia’s 6th Annual Secret Santa Sweepstakes

Spread the cheer of Christmas with Treetopia’s annual Secret Santa Sweepstakes! You and your loved one can get a chance to win a tree and an ornament set by choosing your favorite look from our 2017 Design Council and telling us why it suits your holiday style. Ready those sleigh bells and sing your way through the merriest time of the year!

Duration: November 14-25, 2017

Follow along with Treetopia via social media:

Facebook: Treetopia Twitter: @treetopia
Instagram: @treetopia Pinterest: Treetopia

Scroll to top