Summer to Fall mantel

Hey you! It’s such a pleasure to have you here today! I’m going to be discussing little ways to take your Summer mantel and transition it to Fall! I know, Fall doesn’t officially begin until September 23rd this year, but who can wait that long to decorate?

mantel

A constant around our home is fresh flowers! It’s one of the simplest ways to add character to, otherwise, neutral decor. Grabbing a fresh bouquet from the local grocer or farmers market is a good way to start! Once you’re home, create definition in your arrangements by unwrapping the entire bouquet, starting with larger, longer blooms first. Give the arrangement a fuller feeling by cutting the stems at different lengths. I like to split my bouquets up into numerous containers (even if they’re little!). Cutting off short blooms or extra foliage, looks beautiful when placed in a small votive.

mantel

Since we’re discussing how to transition into Fall, opt for flowers or colors that represent that season. In this particular arrangement, I chose a beautiful, fresh bouquet that included yellow, maroon and orange. It was a lively mix and I incorporated some silver dollar eucalyptus for more definition.

Now comes the fun part: creating a vignette! It is a lot of fun playing with different items and making them come together to create something beautiful! I love creating little vignettes places around my house. I find myself admiring them often! For this mantel design, I simply paired books wrapped in kraft paper (which are my go-to, I love them!), vintage books, candles and a cozy blanket. All those lovely items equals total eye-candy!! Have fun playing with your design. Create prominence with items by placing a stack of books beneath it or resting against it. Step out of your comfort zone a little, and you will no doubt, create something beautiful!

This mantel, may or may not, hold me off for decorating for Fall just a bit longer 😉 I hope that you enjoyed this post and I hope you have a lovely week!

Sharing this post on these blogs!

Simple DIY Banner

Hey you! It’s great to have you here today! I’m excited to tell you I’m apart of a fun little link up called “Home for Fall”! In this link up, you will find all Fall inspired projects! I hope you’re ready to get inspired because there are a lot of great projects for you to check out, share and pin for later! Head over to Hometalk and use the hashtag #homeforfall for all these amazing projects!

Simple DIY Banner

The project I’m sharing is a simple DIY banner that literally takes just minutes to make!

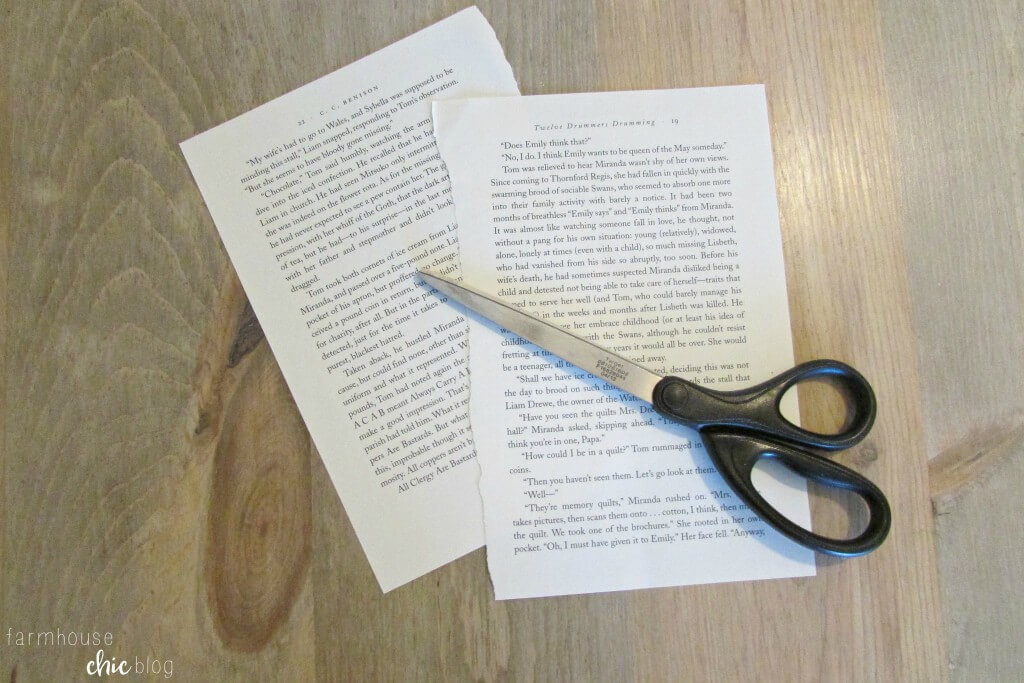
You’re going to use two ripped or unwanted book pages. Cut the edges and bottoms off, so all that’s showing is the wording. It’s going to be a rectangle, cut that in half. Now you have four pieces total. Stack them together and cut that in half, now you have 8 pieces. Grab one stack of four and fish tail the bottoms, do for the remaining four also.

Using a hot glue gun, put two glue dots on the back corners and push into place on your jute. Leave about an inch in between each book page; continue for the remainder. Leave nearly 5 inches on each end of the banner for hanging purposes, and that’s it! Can you believe how easy that was!!

It’s the perfect addition to my chalkboard in my office! I am obsessed with it’s simplicity <3

Simple DIY Banner

Simple DIY Banner

An InLinkz Link-up

Back to school vignette

We’ve got our school supply lists in hand, shopping trip planned and back to school on the brain! So, I got to thinking, why not make a cute little back to school vignette? Who doesn’t love a good vignette? Super simple elements create an adorable presentation!

back to school

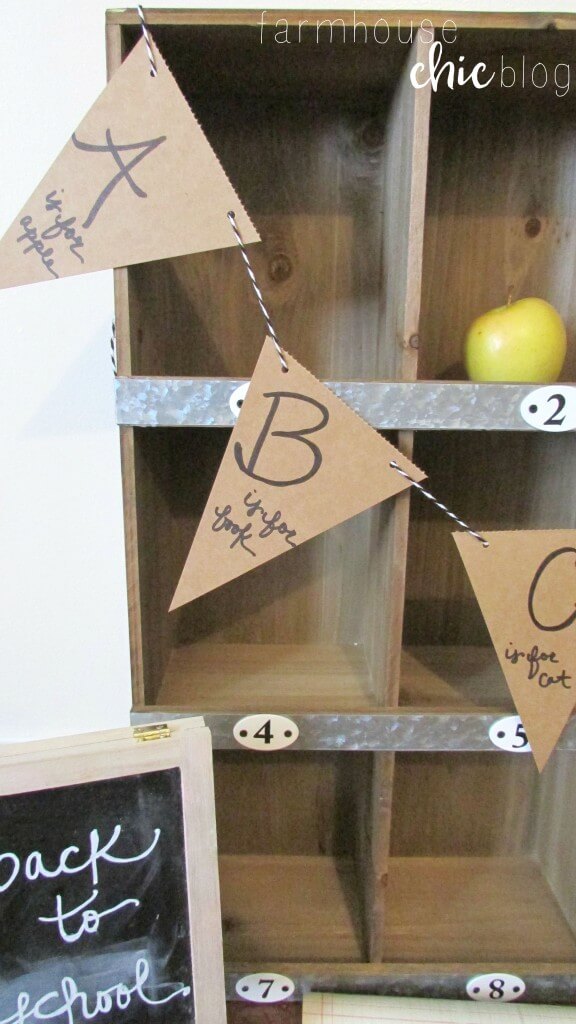
I’m pretty much obsessed with how this turned out! It reminds me of a vintage school theme, and I love it! I scored these kraft paper pennants as a pack from Marshall’s for $1.99. They’re great because it’s a blank canvas, you can make them into whatever you want! I freehanded a few alphabet cards, added it to some twine and just like that I had a banner! I also finally gave in and bought this 9- slot cubby from Target. I’ve been eyeing it for awhile now and decided to snag it for my son’s “big boy” room makeover! Until then, it’s displaying all these cute goodies!

This display is simple to achieve, an apple (signature back to school item 😉 ), alphabet banner, chalkboard, vintage ledger and a couple of no.2 pencils!

Back to school vignette

And now we’re off to go buy our school supplies!! Thanks for stopping by, and I hope you have a great day!

Sharing this vignette on these blogs!

Elegant Thanksgiving Tablescape

Hello there! It’s a pleasure to have you here today! As much as I am ready to bust out all of the Christmas decor and start decorating, I want to take a little time to reflect on just how thankful I am! I think it’s important that we don’t lose site of Thanksgiving and what it signifies! There is absolutely nothing wrong with decorating for Christmas early (and believe me, I will be!), but I also want to take some time to focus on the Holiday we celebrate this month first! Today I will be sharing with you my elegant Thanksgiving tablescape!

Thanksgiving tablescape

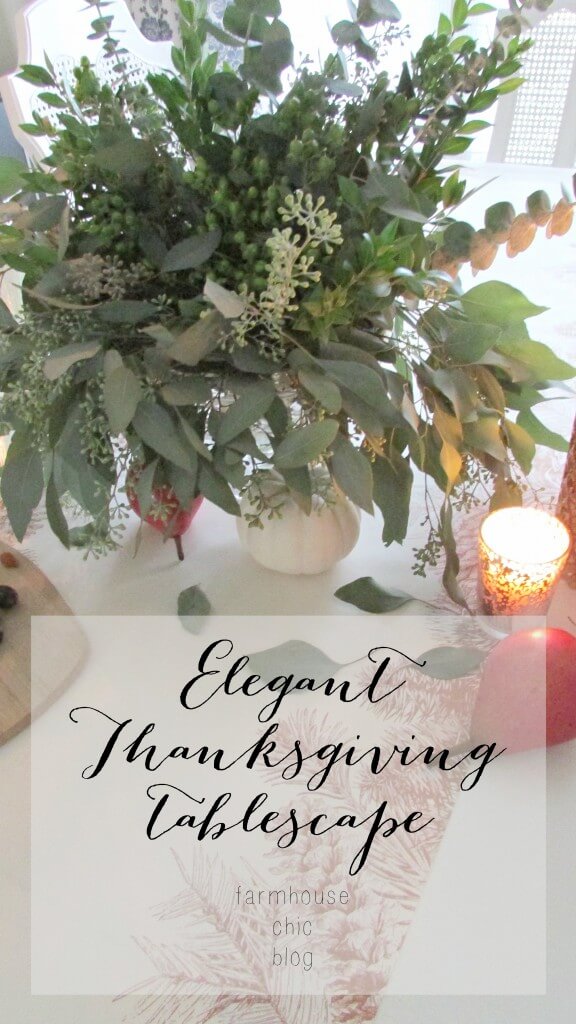
We hosted a Halloween costume party with friends and the following day my Halloween decor was packed up and out of site! My little one and I headed to the store and picked up some beautiful, fresh flowers! I will be sharing the tutorial for making this gorgeous, elegant centerpiece over at Fantabulosity later this month, so stay tuned for that! My obsession with eucalyptus continues, as I incorporated it as the centerpiece in this tablescape! While we were at the grocery, we also picked up three gorgeous red anjou pears, aren’t they lovely? I used mini white pumpkins I already had and also incorporated a stunning mix of mercury glass, votives and a copper mercury glass hurricane I recently bought! I really wanted to create a light, elegant setup using copper and earthy tones.

A few weeks back while shopping at Sur La Table, I spotted an adorable ivory and copper paper table runner on clearance. I bought it and based my entire design off of that! I love it when one specific item sparks the design for an entire tablescape! I can’t wait to show you this tablescape, so let’s get to it!

Thanksgiving tablescape

So what do you think of how this unexpected mix turned out? Thank you so much for stopping by and I hope you have a wonderful week!

Sharing this post on these blogs!

Shop Online for the Right Apple Watch Band for Your Wrist

As you prepare to purchase Apple Watch, you should consider the present apple watch band options and the wrist size that gives an ideal fit. You will come through many bands which require specific sizing while others fit well in the different wrists. This is a guide that will take you in the different Apple Watch bands you would ever wish to come across.

Measure the Wrist

As you select the band, always ensure you get to measure the wrist. Whenever there is a cloth tape on one’s hand, it is best to wrap it in the wrist and acquire an ideal band size. In case you lack a tape measure cloth, it is best to pick on a string and thus wrap it in your wrist. Also, get to use a standard flat ruler or flat tape. The role of the tape is to help measure the string part which fits in the wrist in the right manner. Also, ensure you measure the measuring tape or a string that does not bring errors in the course of making measurements.

Size of Apple Watch

Apple gives Apple Watch Series in 46mm/45mm/44mm/42mm and 41mm/40mm/38mm sizes . The main step involves making a selection of the Apple Watch with the right size. With a smaller wrist, it is best to pick on the Apple Watch which is a smaller option. Also, the larger wrist will require to use bigger models. These apple 38/40/41mm watch models have been designed in a manner that they have a 130 to 200mm wrist size.

Individual Sizing and Band Options of Apple Watch

With an ideal Apple Watch size, you will delve into the different bands which come with the best kind of fit. Besides, you will have a look at the materials that the different bands and the nature in which they feel while put on the wrist. Different Apple Watch bands come in different sizes. Besides, it is not all the bands that are compatible with the different models. For instance, the modern buckle is limited to the use of the 41mm, 40mm and 38mm models.

Braided Solo Loop and Solo Loop

The braided solo loop and solo loop are two types of bands that have no kind of clasp. Besides, the bands come in twelve different sizes rather than the use of an adjustable clasp or loop. As a result, there is a great need for one to measure the bands in the right manner. For you to result with experience watch models which are smaller and compatible with the different bands, take your time. It is quite tricky for any person to acquire the right fit on different bands. For you to get an error-free experience, ensure you visit sharkwatchband site and this way you will determine what is best for your different needs.

Leather Link Watch Band

Leather Link

A band that comes from leather consists of a wraparound fit. The band end is secured with the aid of molded and flexible magnets. This fit is quite different from sport loop and it has leather materials rather than woven nylon. Since it is made of leather, it is best for use as one exercises especially in water. This way, you will ensure you never get to subject it to the presence of sweat.

Modern Buckle

This is a product which is made of leather materials. Besides, this product is much smaller. In the case of compatibility, it has great compatibility with the 44, 45 and 46mm larger apple watches. Besides, the modern buckle contains a buckle clasp that fits well with different bands. As a result, there is a great need to ensure you purchase the size which is appropriate for the wrist size. The main sizes are three and the smallest measures 135mm.

Milanese Loop

You will find that the Milanese loop consists of a stainless steel mesh which comes with a wraparound design that is much similar to the Sport Loop. Similar to other Apple Watch bands, their size kicks off at 130mm. Also, there is a great need for one to note the Apple Watch bands which are smaller have a 200mm topping. In the case where one has a larger wrist, you will find the Milanese Loop to be much smaller.

Conclusion

With all the different bands in the market, the best fit is one that matches your size. The major watch bands entail the Solo Braided Loop and the Solo Loop stretch. With these two kinds of bands, you will determine the size which is best for you.

Scroll to top