DIY

The Windsor Bench

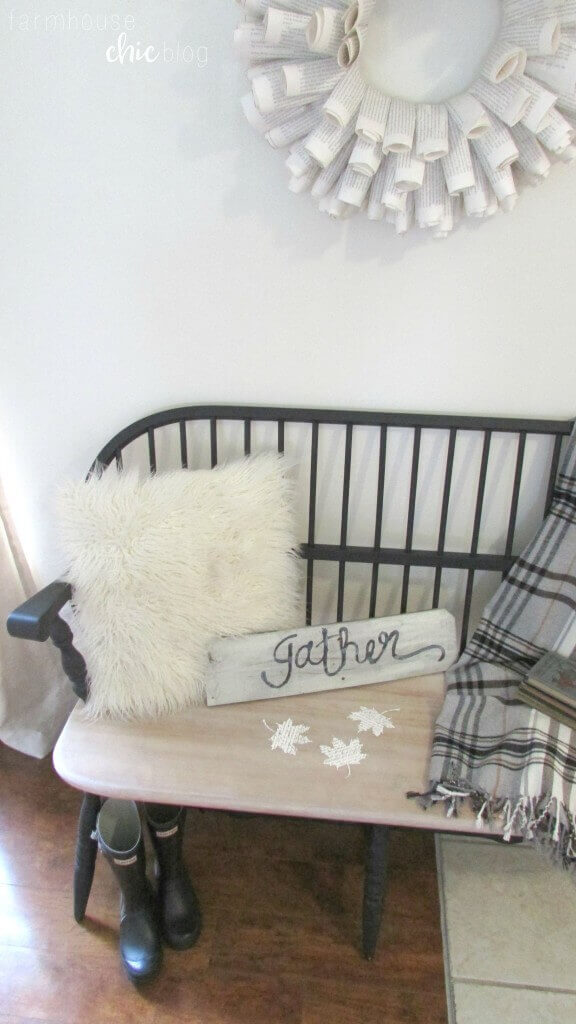
Hello friend! It’s great to have you here today! It was a beautiful weekend that consisted of lots of laughs, dreamy weather and a little farm market that had pumpkins!! As you can imagine, I was ecstatic about that! I have been busy preparing for the barn show I will be a part of the first of October ( I will share more about that later!). That has put me even more in the mood for Fall, because I’m making so many lovely Fall decor items! With that said, I finally finished the Windsor bench and I was eager to decorate it for Fall 🙂

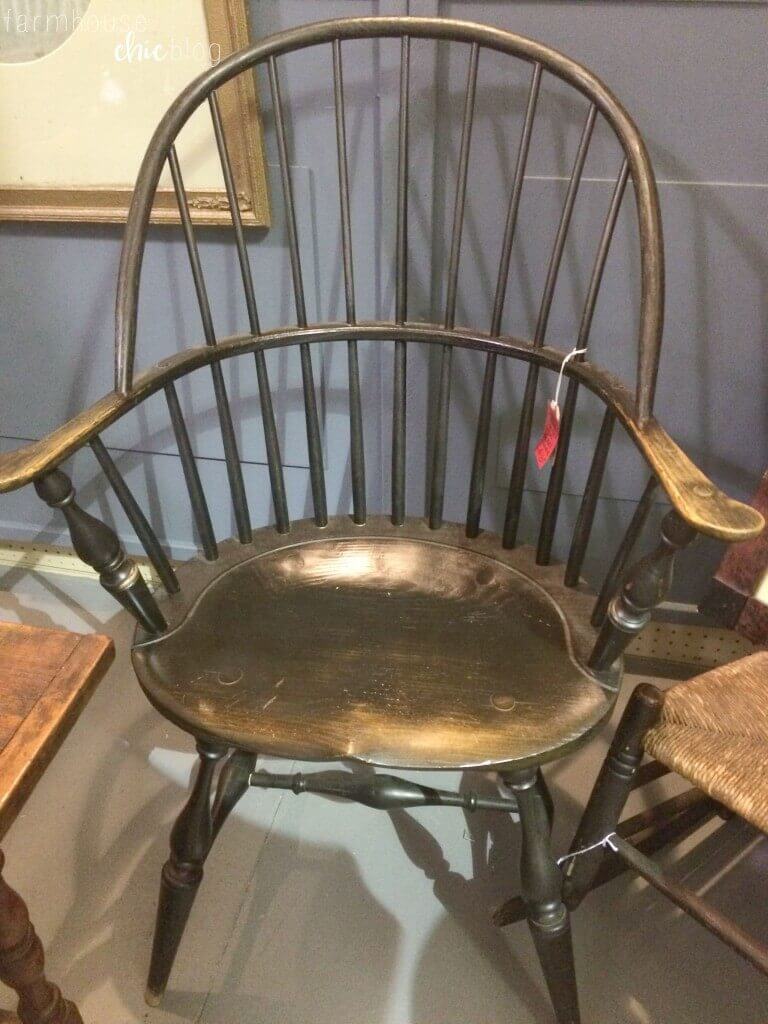
A few months back while shopping at a local Antique Mall, I came across a really lovely, old black Windsor chair. I mean this thing was beautiful! I quickly looked at the price tag, only to be shocked it was $495! Say whaaat? Crazy stuff right there! I left, somewhat, broken hearted…
home decor

A few days later, to my surprise I came across a very similar bench someone was selling. I jumped on that like a hot cake, and ended up getting it! I was like a little kid in a candy store! It was beautiful, and I couldn’t wait to get working on it!

When we bought it, it was a combination of hunter green stained wood and a stained maple-colored seat. I didn’t care for the combination, and I kept reverting back to the black Windsor chair, so I knew it was going to be black! Black is a color I have never painted a piece of furniture before, so I was a little intimidated… You can see the “before” picture below, and PLEASE excuse our messy garage! I’m just keepin’ it real folks 😉

home decor

Before I got to painting, I sanded the seat down to the natural wood. It was looking better already!! I began painting soon after, no taping off, nothing. I quickly realized that was a big mistake when I started getting close to the ends of the spindles; oh, did I forget to mention the seat wasn’t going to be painted black! Yes, so smarty pants me, I figured I could easily sand off any small marks I would get on the wood while painting.. wrong! It was a disaster, and I may have cried. I called my husband and he had just the trick to fix it. He hooked up a wire brush attachment to his cordless drill, and with a little bit of time, the paint marks were gone! I took the time (a really, really long time!) to tape around each spindle so no marks would get on the seat. Using a foam brush, I began painting with folk art rich black chalk paint. I love this chalk paint! It covers amazingly, and is so affordable compared to similar products. I allowed each coat to dry completely, giving it a total of 3 coats. The entire piece dried for a couple of days before I began the next step!

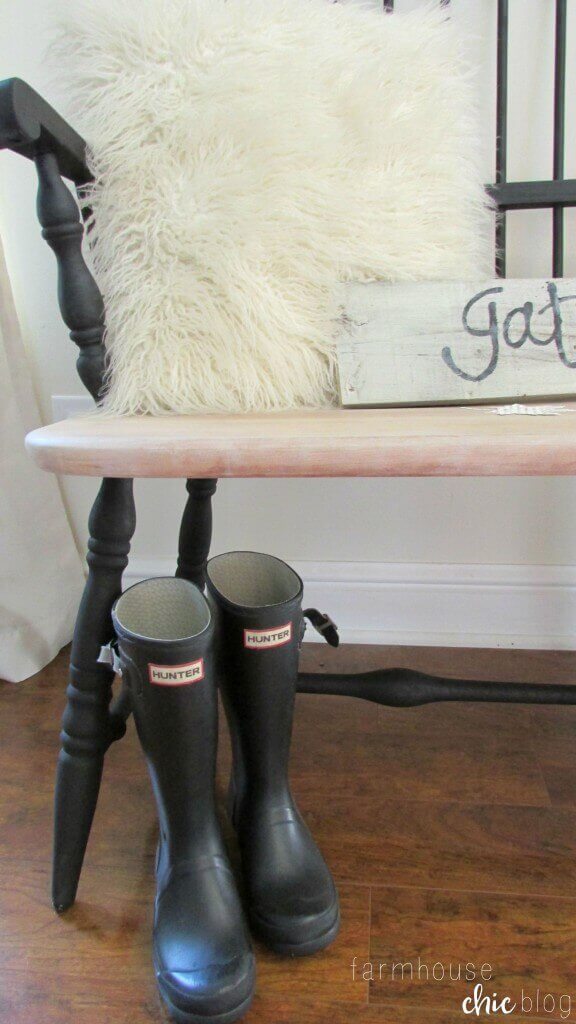
I loved how the bench looked!! It was a totally different piece from when I had first got it! But, I wasn’t done yet… I wanted a little more character, so I opted for Miss Mustard Seeds white wax. I applied the wax using a wax brush, applying even coverage to each part. I gave it a good two coats. Once it was dry, I topped the entire piece off with a folk art clear wax. And it was finally done! DONE! I was so happy with how it turned out! I couldn’t wait to get it inside and stage it for Fall 🙂

home decor

home decor

home decor

home decor

So, what do you think of how it turned out? I can’t wait to hear what you all have to say!

Thanks so much for stopping by and hanging out with me a bit today!

Sharing this project on these blogs!

* Affiliate links provided for your convienece!

Summer to Fall mantel

Hey you! It’s such a pleasure to have you here today! I’m going to be discussing little ways to take your Summer mantel and transition it to Fall! I know, Fall doesn’t officially begin until September 23rd this year, but who can wait that long to decorate?

mantel

A constant around our home is fresh flowers! It’s one of the simplest ways to add character to, otherwise, neutral decor. Grabbing a fresh bouquet from the local grocer or farmers market is a good way to start! Once you’re home, create definition in your arrangements by unwrapping the entire bouquet, starting with larger, longer blooms first. Give the arrangement a fuller feeling by cutting the stems at different lengths. I like to split my bouquets up into numerous containers (even if they’re little!). Cutting off short blooms or extra foliage, looks beautiful when placed in a small votive.

mantel

Since we’re discussing how to transition into Fall, opt for flowers or colors that represent that season. In this particular arrangement, I chose a beautiful, fresh bouquet that included yellow, maroon and orange. It was a lively mix and I incorporated some silver dollar eucalyptus for more definition.

Now comes the fun part: creating a vignette! It is a lot of fun playing with different items and making them come together to create something beautiful! I love creating little vignettes places around my house. I find myself admiring them often! For this mantel design, I simply paired books wrapped in kraft paper (which are my go-to, I love them!), vintage books, candles and a cozy blanket. All those lovely items equals total eye-candy!! Have fun playing with your design. Create prominence with items by placing a stack of books beneath it or resting against it. Step out of your comfort zone a little, and you will no doubt, create something beautiful!

This mantel, may or may not, hold me off for decorating for Fall just a bit longer 😉 I hope that you enjoyed this post and I hope you have a lovely week!

Sharing this post on these blogs!

Simple DIY Banner

Hey you! It’s great to have you here today! I’m excited to tell you I’m apart of a fun little link up called “Home for Fall”! In this link up, you will find all Fall inspired projects! I hope you’re ready to get inspired because there are a lot of great projects for you to check out, share and pin for later! Head over to Hometalk and use the hashtag #homeforfall for all these amazing projects!

Simple DIY Banner

The project I’m sharing is a simple DIY banner that literally takes just minutes to make!

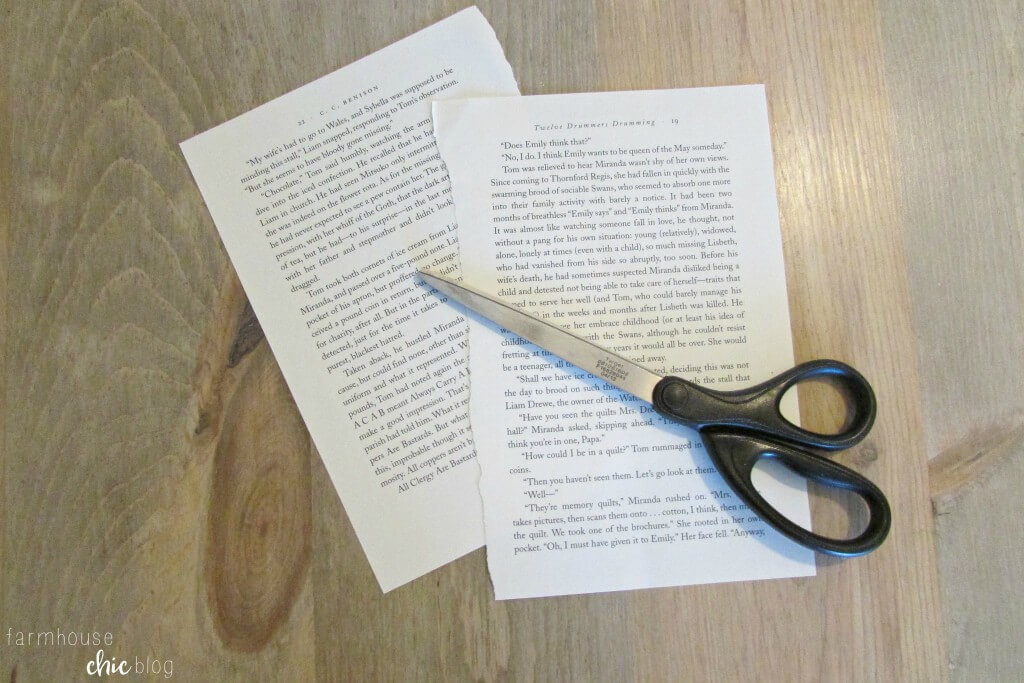
You’re going to use two ripped or unwanted book pages. Cut the edges and bottoms off, so all that’s showing is the wording. It’s going to be a rectangle, cut that in half. Now you have four pieces total. Stack them together and cut that in half, now you have 8 pieces. Grab one stack of four and fish tail the bottoms, do for the remaining four also.

Using a hot glue gun, put two glue dots on the back corners and push into place on your jute. Leave about an inch in between each book page; continue for the remainder. Leave nearly 5 inches on each end of the banner for hanging purposes, and that’s it! Can you believe how easy that was!!

It’s the perfect addition to my chalkboard in my office! I am obsessed with it’s simplicity <3

Simple DIY Banner

Simple DIY Banner

An InLinkz Link-up

Back to school vignette

We’ve got our school supply lists in hand, shopping trip planned and back to school on the brain! So, I got to thinking, why not make a cute little back to school vignette? Who doesn’t love a good vignette? Super simple elements create an adorable presentation!

back to school

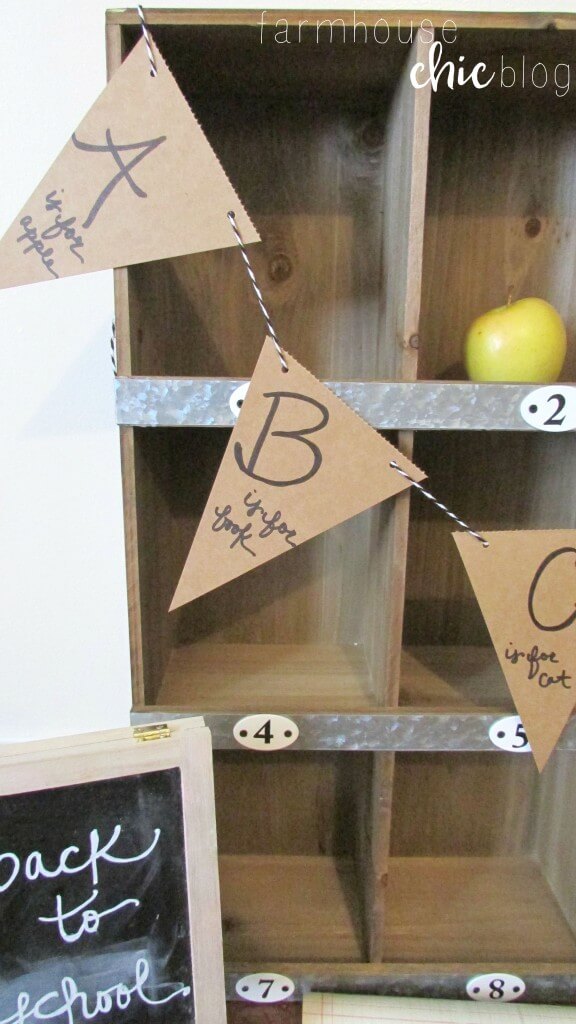
I’m pretty much obsessed with how this turned out! It reminds me of a vintage school theme, and I love it! I scored these kraft paper pennants as a pack from Marshall’s for $1.99. They’re great because it’s a blank canvas, you can make them into whatever you want! I freehanded a few alphabet cards, added it to some twine and just like that I had a banner! I also finally gave in and bought this 9- slot cubby from Target. I’ve been eyeing it for awhile now and decided to snag it for my son’s “big boy” room makeover! Until then, it’s displaying all these cute goodies!

This display is simple to achieve, an apple (signature back to school item 😉 ), alphabet banner, chalkboard, vintage ledger and a couple of no.2 pencils!

Back to school vignette

And now we’re off to go buy our school supplies!! Thanks for stopping by, and I hope you have a great day!

Sharing this vignette on these blogs!

Ikea Rast Dresser Hack

Hey friends! I’m so happy you’re here today! It felt so good to get back into working on projects and doing what I love! I had the pleasure of making over an ikea rast dresser hack! I can’t wait to share with you how it turned out!

Who says you can’t take a simple ikea rast dresser and make it into your own? I’m here to show you today, just how easy it can be! Take a simple wood dresser, and turn it into your favorite piece of decor! I knew as soon as I got it, that I wanted to give it a makeover to fit in with my son’s industrial themed bedroom! I already had a design in mind, so I just went with it!

Ikea rast dresser hack

The first thing I did was give the piece a nice coat of stain. I used minx in dark walnut. From the picture below, it looks a bit splotchy, but it dried evenly. I wasn’t too worried about the splotchy-ness because I was going to be covering it with white chalk paint.

Ikea rast dresser hack

After letting the stain dry completely, I gave it a good coat of folkart chalk paint in white adirondack. Allow the first coat to completely dry. Before applying the next coat, lightly sand the first coat of paint using a sanding block. This is very important so that your paint is smooth and ready for the next coat of paint!

Did I mention lightly sanding? 😉

Apply your second coat of paint and allow to try.

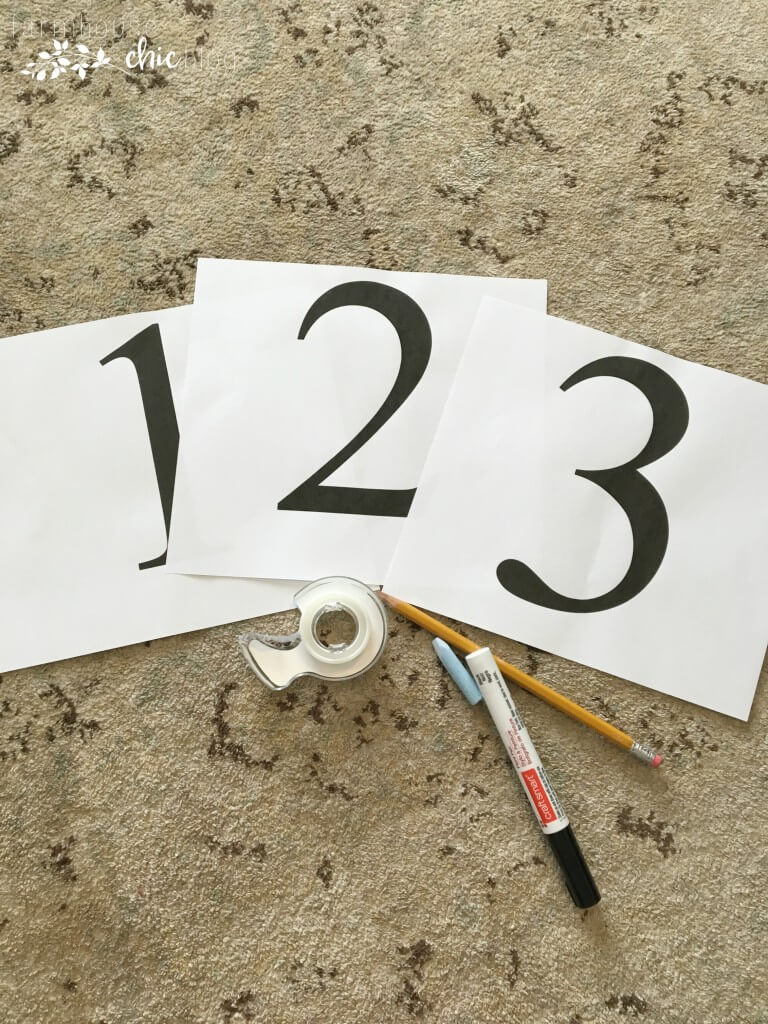
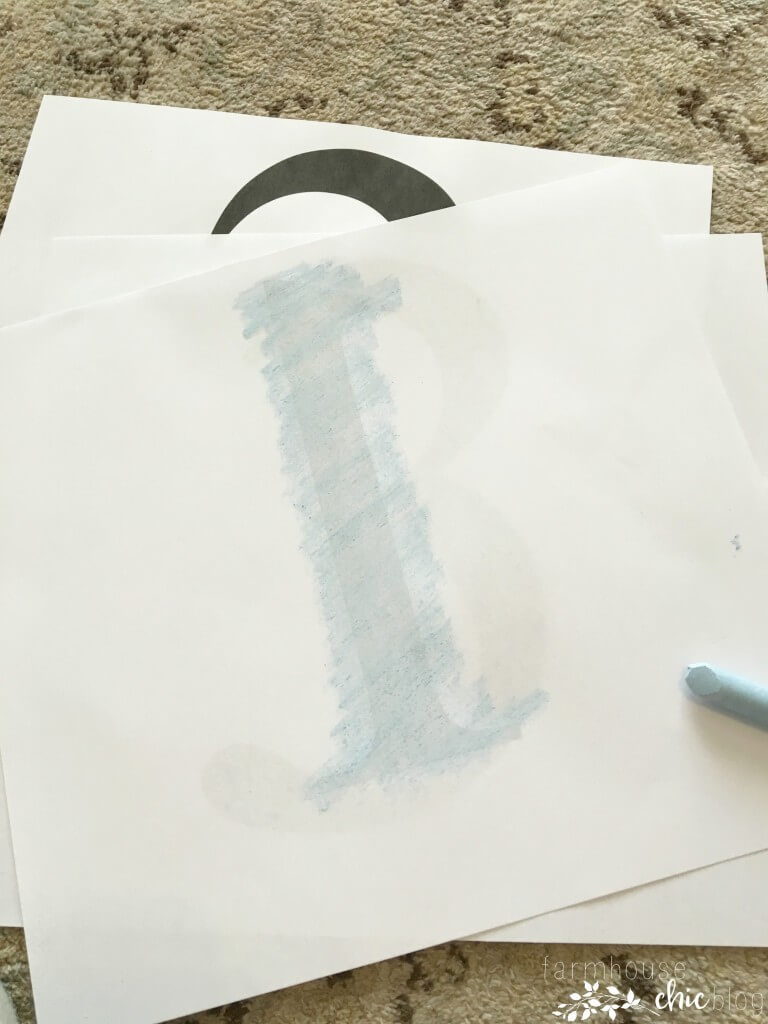
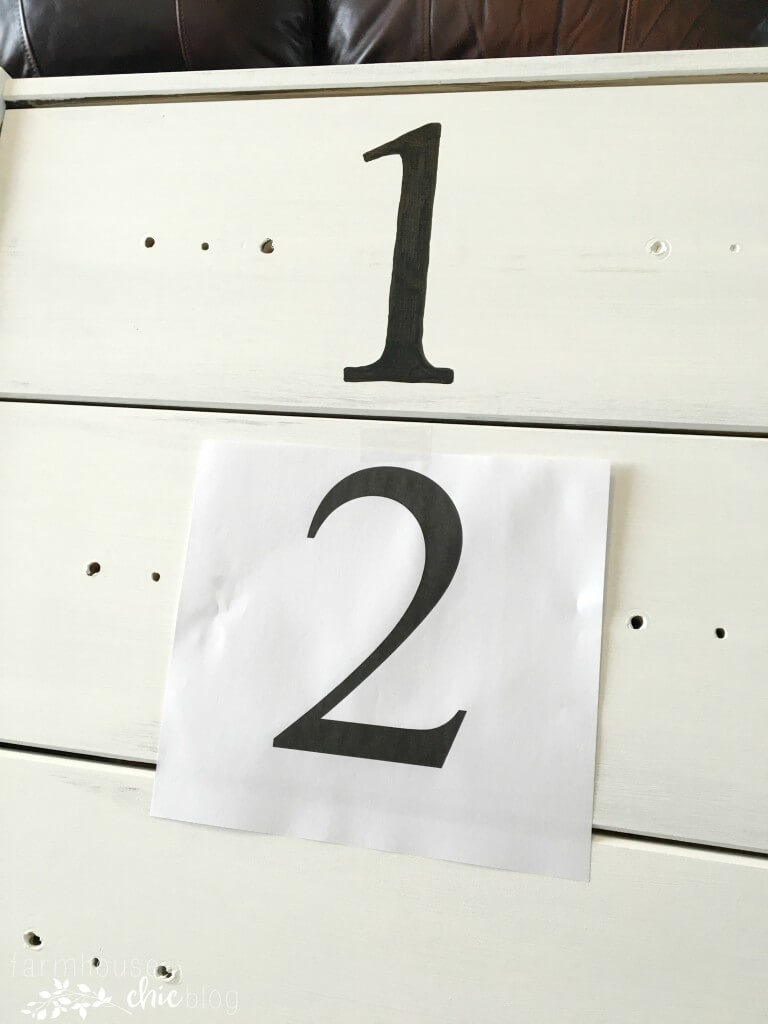
Since I was going with an industrial theme, I knew I wanted big numbers to number each drawer. I simply printed out numbers I easily created on PicMonkey and printed them out. Also grab a piece of chalk, pencil, tape and paint pen. One of my favorite and go-to techniques to easily paint on wood, is simply tracing the image from the print. To start, simply grab your printed image, flip it over and brush the chalk over the entire image. Place the image in your desired spot on the wood (chalk side down), tape into place and grab your pencil to simply trace over the image (or in my case, a number!). Once you remove the paper, the chalky image will be left behind! Now you can grab your paint pen and go to town! I did this for all three drawers.

Ikea rast dresser hack

Ikea rast dresser hack

Ikea rast dresser hack

Ikea rast dresser hack

When your paint pen image is completely dry, sand any places with a sanding block that you want to appear “worn”. If you’re finished with your piece, use a clear wax to seal it! Allow the wax to dry before adding hardware.

I chose beautiful, antiqued cup pulls from Hickory Hardware for this dresser hardware. It was just the touch the dresser needed to give it that industrial look!

Ikea rast dresser hack

Ikea rast dresser hack

Ikea rast dresser hack

I’m really pleased with how it turned out! I feel like I captured the industrial look I was going for! It will be perfect for little odds and ends in our finished basement!

Thanks so much for stopping by and checking out my ikea rast dresser hack!!

Scroll to top